Thursday, 19 June 2014

Different Shot Types!

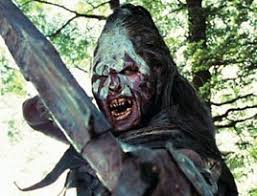
Over the shoulder shot - This shot is used usually between two people having a conversation, it's a useful shot to use to switch back and forth when characters are talking, here are two orcs from Lord of the Rings in mid-confrontation
Medium Close up - This shot is used to identify the characters emotions and body language but also to show what's happening in the background as well.
POV (Point of View) This shot is from someones or something perspective, in this example it is from the character 'Boromirs perspective as 'Lurtz' Points an arrow at his head.
Medium shot - This shot is used to establish and identify a character and show there body language, usually from the torso upwards, here is Legolas from Lord of the Rings, you can see by his body language that he is ready for action with his bow semi-drawn.
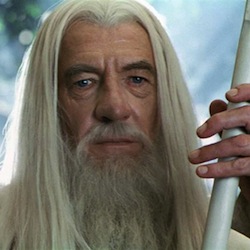
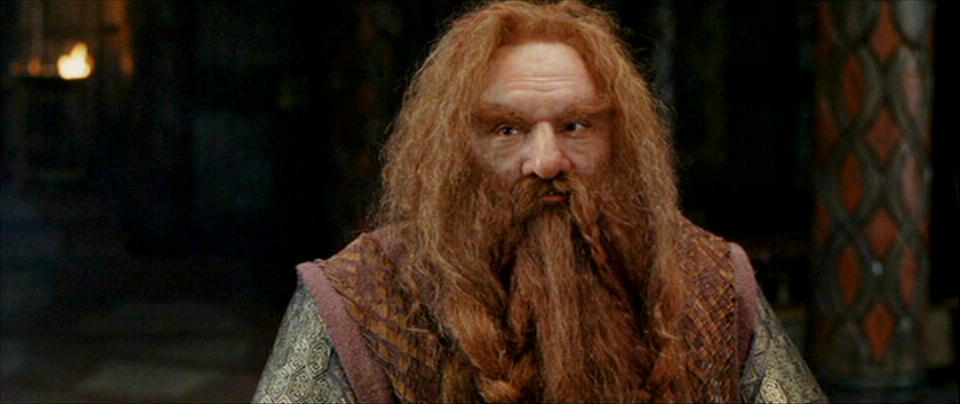
Close up - This is shot is usually a close up an actors face, used to show the emotions of the actor, for example here is Gandalf from Lord of the Rings
Extreme close up - This shot, is what it says; an extreme close up of anything, this example is the One Ring from Lord of The Rings
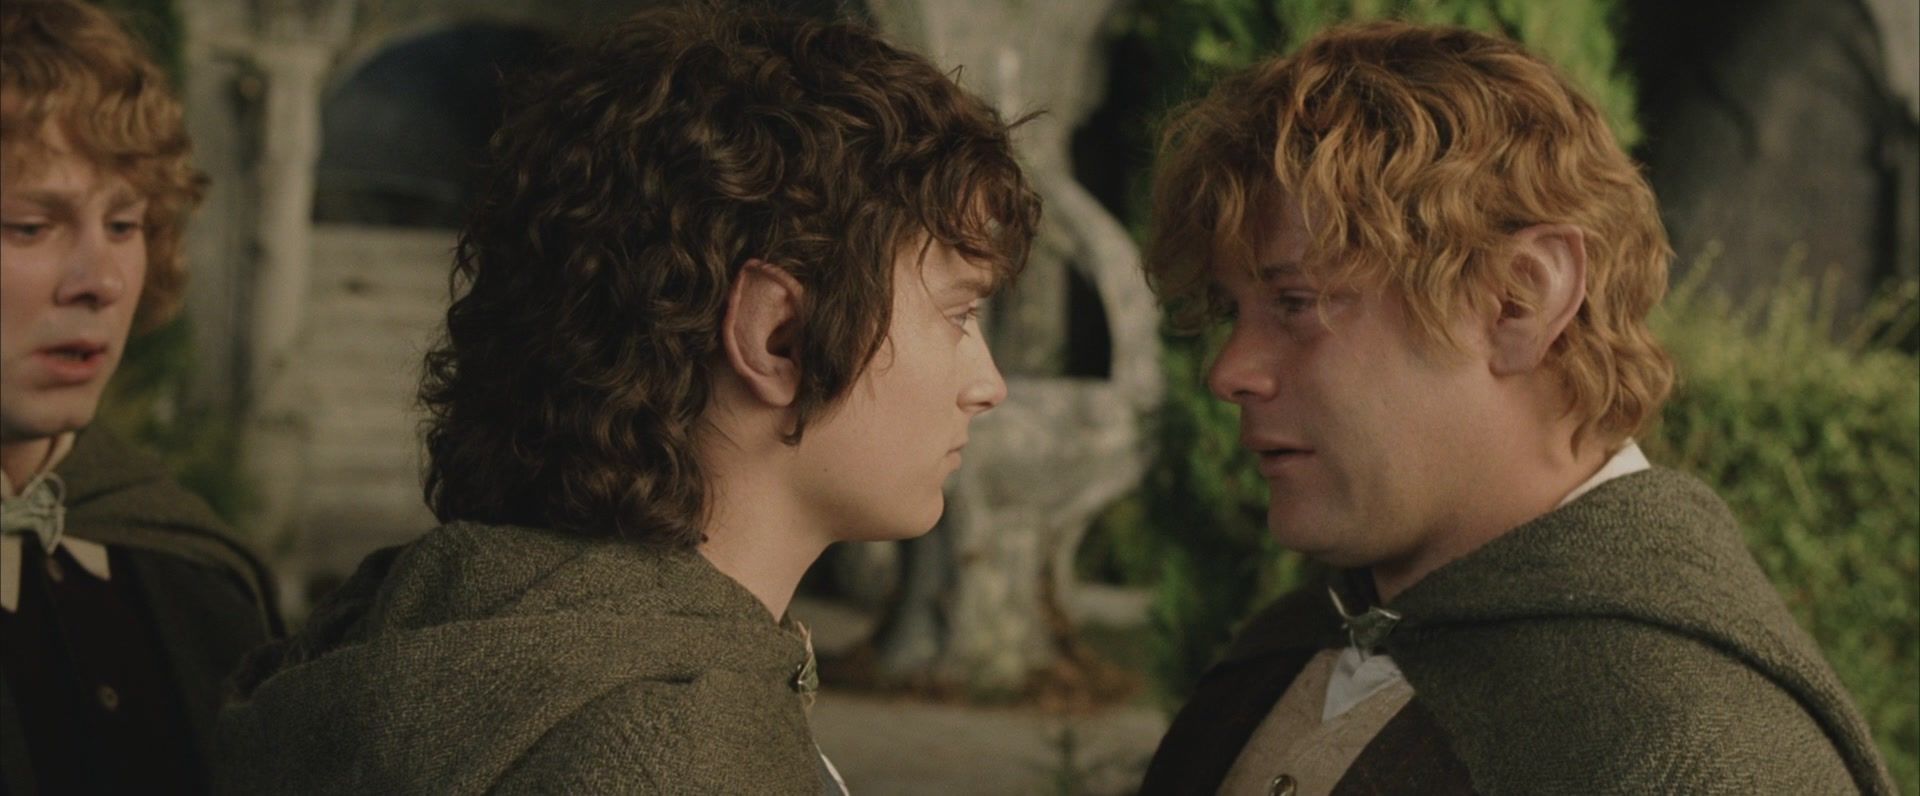
Two shot- This shot is used to get two characters in a shot, usually having a conversation. This example is Frodo and Sam from Lord of the Rings
Wide Shot - This shot is used to get all the action in one shot, and to establish the characters this is an other example from lord of the rings
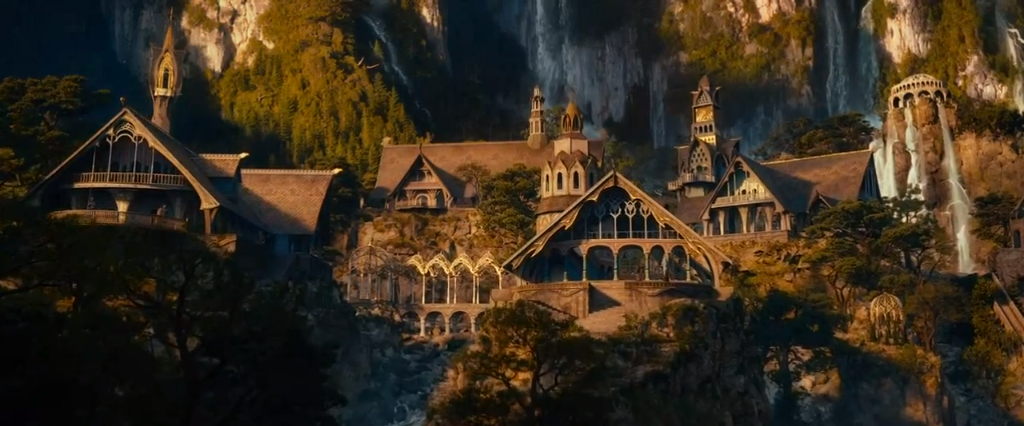
Establish shot/Extreme wide shot - This type of shot is used to establish the location of the scene, this example is from Lord of the Rings, it is the Elven city of Rivendell


Conclusion

If you've went through all my blogs you should now have a good idea and understanding on how to work Adobe Premiere Pro, how to edit footage and what editing really is, I hope you've found my blogs useful and they will help you in your future work and projects.

Monday, 16 June 2014

Principles of Editing

Quentin Tarantino on film editing:For a writer, it’s a word. For a composer or a musician, it’s a note. For an editor and a filmmaker, it’s the frames. The one frame off, or two frames added, or two frames less… it’s the difference between a sour note and a sweet note. It’s the difference between a clunky clumsy crap and orgasmic rhythm.”

The main principles of editing are: 

  1. Telling a story- Creating a film with a story line and continuity to keep the audience interested.
  2. Creating a meaning- A film must have a meaning, purpose or motive, with out these it would just be shots strung together with no editing.
  3. Creativity - Good editing techniques allows more room for creativity, giving editors freedom to create a professional film that will attract viewers
The principles of editing are  used to try and get the best out of the footage you have. They are sort of like rules and guidelines, they can be broken and used alternatively to greater effect but the majority of editors stick by them. When researching the principles of editing I managed to stumble across a very early soviet film theorist and editor by the name of Vsevolod Pudovkin he was one of the great innovators in early film. He believed that editing, the organisation and placement of shots was a means of expression, that was completely unique to film making, unlike the other art forms such as theater, literature and paintings etc. Although he isn't as well know as other soviet film makers, He coined five extremely important principles of editing which are: 
  1. Contrast ( Cutting from one shot to another completely different shot, allowing viewers to compare the two different scenes)
  2. Parallelism ( This is connecting two scenes visually by matching certain elements between the scenes, it is commonly used to switch from location to location)
  3. Perfect example of Symbolism in Space Odyssey (2001) A bone thrown in the air changed into a space station symbiosis evolution of humans.
  4. Symbolism ( Similar to parallelism, but this time the connection between the two scenes are connected symbolically, for example in Alfred Hitchcocks 'Psycho' When a close up shot of blood flowing down a bath tub drain turns into a human eye of a dead person, the drain is the same shape and size as the eye in the next scene (parallelism) but the symbolic meaning behind the two scenes is the metaphor 'A life down the drain'. 
  5. simultaneity/cross cutting ( This is when the movie switches between two scenarios back and forth)
  6. leit motif (even though this usually means a constantly recurring musical theme usually associated with a place, person or idea, for exapmple in the movie Star Wars when the Sith Lord Darth Vader enters you will hear the emperors march theme. But Pudovkins idea of Leit Motif was a certain shot, like a recurring shot of a clock to show the importance of the time)
These examples of five principles/techniques are very important in film making now, almost every film will use these.

Sunday, 15 June 2014

Starting a Project

In this blog ill go step by step on how to create a new project on Adobe Premiere Pro because today I am creating my own new project with my class. I have called the project Shot Types and I will be using Adobe Premier Pro software. Here are the steps that i used below:


  1. Click new project and give your project a name
  2. Change the presets to 1080p and then click on AVCHD 1080p25
  3. Find your files in the media browser and highlight all the footage and drag and drop into the editing bin
  4. Rename the footage by double clicking on the footage in the editing bin.
  5. Drag the clip to the players and set points where you want the clip to start and finish.
  6. Add the finished clip to the timeline sequence and repeat to all the clips you want in the player.
That's all the steps I used, I have successfully finished three projects now, check the rest of my blogs to view them.

Filming Duties

As you could imagine when it comes to filming for a project each person will have a duty to do. whether it be in front or behind the camera.
This is a camera man, doing his part!

The camera man is in charge of...well it says it in the name, the camera! his duties would be to set up the camera, at  desired angle for each shot and then record the footage. The directors duty is to direct the movie, obviously. He/she basically has to make sure everything runs smoothly, they will direct the actors, tell them what to do and what positions they should be in. They have to give the signal to the camera man when to start recording and when to stop recording as well. When the director says 'rolling' the cameraman will start recording then they will say 'action' a few seconds later and that is when the scene takes place. The reason there is a few seconds between saying rolling and action is so there is time for the actors to prepare and its gives more room for editing. 

And for the actors, well they act! They do what the director tells them, and hope they don't forget their lines.


Each person has a duty to do when filming where ever it is infront of the camera or behind the camera.
The cameraman roles are to set up the camera in a postion ready to start filming and to make sure it is in a good angle.When the director says start rolling this means that the camera man should start recording on the camera and gives the actors a few second to get in position.

The directors job is to make sure everything is going smoothly and everyone is in position.When the director says cut this means everyone can stop what there doing, if the director says action this means that the actors should start acting.

Camera and Tripod

For this blog i will talk about setting up the camera and tripod. A tripod isn't always a 'must' when filming but they can be handy depending on the shots you are filming, anyways the first step would be to remove the tripod from its bag and uclasp the legs, then you can decide on the length of the legs, obviously this depends on the shot you want. Unlock the middle leg, extend that to the same length as the others then your tripod will be up and ready for action.

You will see that on the top of the tripod there is a pad/platform, this is where you attach the camera. Unlock the pad and attatch it to the bottom of the camera it should be fairly easy to screw on, now re-attach the pad to the tripod with camera on it. The camera and tripod are now up and ready, you'll notice there is a handle on the tripod, this is so you can maneuver the camera around when filming. Now enjoy your filming!


These are few different ways in which you can manipulate the Tripod 


Tuesday, 10 June 2014

How Editing Has Changed Over Time


Editing has evolved drastically since movies were first produced, the technology became more advanced and audiences expected more and more. The first film makers weren't keen on the idea of editing film shots, as they thought it would confuse people and ruin the film however they soon found out that this was not the case. They realised that editing footage together allowed them to create more complex stories! The earliest films created weren't edited at all, they were usually just short, static clips, using one camera angle. Robert W. Paul, a British electrician was one of the most influential early film makers, his 'Come along, do!' pioneered modern film editing, even though the final film was only thirty eight seconds long, it's considered one of the most significant films ever made because it was the first example of film continuity, apparently it was one of, if not the first film made with more than two shots!

 The first proper film editor was D.W Griffith, he invented and popularized all sorts of film making techniques, his hit film 'Birth Of A Nation' was ridiculously popular, even though it was heavily criticised for portraying a negative depiction of African/Americans, it pioneered the use of advanced camera and different narrative techniques. Apparently D.W Griffith was the first man to use a close up shot and believe it or not, at the time audiences didn't understand the idea and said they wanted to see the whole actors body since they had paid money to see them. From then on, film editing started to snowball and more and more techniques followed such as coloured films, advanced transitions and all sorts. Other film makers hit the ground running as the technology they used advanced. And i think as time went on and the technology got better and better, film makers started to become more creative and intuitive. A prime example of this is Alfred Hitchcock, 'The master of Suspense', he is widely recognised as the most influential and important person ever to be in the film industry. He created an unusual and unique style of film making, he pioneered the use of a camera made to move in a certain way, that it mimics the actors gaze thus forcing viewers to engage in a form of voyeurism. He was also well known for framing shots to maximise peoples emotions in the film, such as anxiety, fear and empathy. All of this made him unique and stand out from other film makers at the time. One of his most popular films; 'Psycho' at the time, sex and violence weren't popular on the big screen, but this film set a whole new benchmark for the acceptability for violence, sex and deviant behavior in Hollywood. One scene in the film, which no doubt you'll have seen before is the infamous shower scene. It's known as one of the best know scenes in cinema. It showcases Hitchcocks skills as a film maker, the scene is three minutes long and has seventy seven different camera angles!This the infamous shower scene!

Nowadays, film editing has been taken to amazing levels, the technology is so much more advanced, it has allowed for modern classics such as Avatar, 2012 and The Avengers to be created, and all because of the rubbish old films that were first created. And now CGI (Computer Generated Imagery) has took films to a whole new level, and no doubt there will be even better technology and effects for us to see in the future.

Wednesday, 4 June 2014

Rendering

As you know, Premiere Pro attempts to play back any sequence in real time and at full frame rate. However, real-time, full frame-rate playback is not always possible. There is a solution for this; rendering the sequences.
To play back complex sections in real time and at full frame rate, you may have to first render preview files for those sections. A red render bar appearing in the time ruler of a sequence indicates an unrendered section that probably must be rendered in order to play back in real time and at full frame rate. A yellow render bar indicates an unrendered section that probably does not need to be rendered in order to play back in real time and at full frame rate. Regardless of their preview quality, sections under either red or yellow render bars should be rendered before you export them to tape. A green render bar indicates a section that already has rendered preview files associated with it.

Cutting and Editing Footage

Editing is the process of getting all your clips in the right order in the Timeline. Trimming is the process of adjusting the point where we switch between clips so that both the action and the story flow smoothly from one clip to the next.
When editing you will chose what clip goes in the timeline next, in the project panel. You would then “mark” the clip by setting an In and an Out in the Source monitor and edit it into the Timeline at the position of the playhead. 
Adjusting a clip's In and Out points after it is already edited into a sequence is called trimming. Typically, you trim clips to adjust how they play back in a sequence. For example, as you view the edit, you want to cut to the incoming clip a little sooner than you originally planned while marking clips. To fix that problem, trim the clip using trimming tools in Premiere Pro.
You can trim clips by dragging the edge of a clip. A clip's "edge" is a clip’s In or Out point, or edit point. Several specialized tools and techniques allow you to trim an edit point. These tools and techniques allow you to trim more easily and accurately, reducing the number of steps involved and maintaining the integrity of the sequence.


This is what it should look like when you are cutting and editing footage in Adobe Premier Pro, you can see on this screen shot someone is cutting footage.

Video: Text Message Film

Tuesday, 3 June 2014

The Purpose of Editing

Editing is one of the most important aspects of film making. The purpose of editing your footage is so you can tell a story and engage the viewers. By editing one sequence, you can create a million different stories, depending on the way the footage has been edited. You can change the tempo, speed, brightness and add certain transitions this can allow you to create anything you want from the sequence you have. You could probably imagine that without editing movies would be pretty dull, in the past movies weren't edited properly sometimes not even edited at all so it was the same camera angle with no transitions or effects, imagine how boring that was? Well, even although they are considered masterpieces and paved the way for the modern classics we watch now, they were boring! But this allowed us to advance and progress and now modern editing has helped bring the viewer closer to the film and allowed so much more room for creativity. Now you can understand the purpose of editing and why it's so important in film making.

Wednesday, 14 May 2014

Exporting a Film

Once you have completed your project, you will want to export your film, which means it will be your final cut and not just a few sequences on premiere pro.. Here is a few quick steps on how to do so; Firstly you want to click file > export media. Once you have clicked that a box will come up on the screen. You want to tick three options; 'Use Maximum rendering Quality', 'Frame Blend', Render and maximum depth'. Once you've ticked those you can change the name of your project. Now that you've done all that click export, and your movie will be exported.


Tuesday, 13 May 2014

Adding Music and Mixing sound

In Premier Pro you can add additional audio such as music or effects. Firstly, All you have to do is import whatever audio you want to use into the project. Now you will see the imported audio file listed in the 'Project' docker under 'Name'. You will now click on the audio file you have just imported and drag into your timeline to 'Audio 2'. Now if you want the audio of video covered by the audio you have just selected, click on the speaker icon (toggle track output) in Audio 1 in the timeline, this will set the audio of the video to mute and your audio will play over the video. If you want to hear both the audio you have selected and the audio of the video, all you have to do is drag a yellow line in the audio 1 track up and down. You can do this as well in Audio 2 track, after expanding, by clicking on a small arrow in the Audio 2 track.

Uploading Footage to a Computer

As you could imagine, when you're filming footage you will eventually have to upload it to a computer. This blog will show you step by step how to do so. The first thing to do is to make a new folder so you can upload your footage to there. Then you would  plug the USB into the computer then switch the camera on. Four options will come up on the camera, you must select the option 'USB connect', which is on the top left. Once all the software has been connected and installed a folder will automatically pop up giving you the option to browse all the files on the camera. Recorded footage will be in a folder called 'MP_ROOT', open that and  drag and drop the footage onto your computer, open the footage you want in premier pro, it will be  at the bottom left of the screen in the 'Z-drive' Then your footage has been successfully uploaded.


Thursday, 8 May 2014

Timelines

The timeline, at the bottom of the screen, is essentially the panel in which your video takes shape. When you've uploaded your footage all you do is drag the desired footage from the project panel and drop it into the timeline.

Once the footage is in the timeline you can adjust edit points, making the clip you've used shorter or longer. You can also create multiple layers of videos, such as titles or superimposed images, you can do the same with the audio. Once you've done all this you can edit the footage.

Wednesday, 7 May 2014

Adding text in Premier Pro

In Premiere Pro you can add titles or texts to your sequences. All you have to do is position your play head over the area on your timeline sequence where you want the title to start.
After that, in the menue at the top click on Title >  New title > Default still. Then you would name the file for your title.
Now a box will show up with a lot of settings you can make when you create your title. The title will be displayed on the frame where you positioned your playhead. So you can see how changed you make to the title setting will look against the appropriate background.
To actually create the title, click on the 'type' tool in the tools palette on the upper-left of the screen. Then click on the main screen and type whatever you want for the title.
You can now use the settings menus to the top right to change the font, size colour of the title. You can also add other effects such as a drop shadow and strokes.
To change the position of the title on the screen click on the selection/arrow tool in the tool palette  and click on the title to drag it around the screen.
Go to the 'Project' pane and you'll see the title you've just created listed as a file there. Click on it, hold down your mouse  and drag the title to a video track at the position on the Timeline where you want the title to appear. Release and the title you created will be displayed on the Timeline.
That's all the steps you will need to add titles into your project, enjoy!

Adding Transitions in Premier Pro

When making a project such as a short movie, you will probably want to add transitions. Here are a few simple steps to show you to do so; (cover transitions)

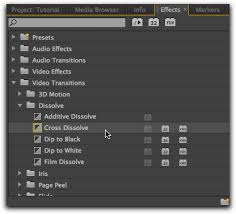
1) First off you want to select the 'effects' panel on the lower left hand-side of the screen. Open the video transitions folder.
These are the bins that have all the transitions in.


2) Then you would select the type of transition you want to use. There will be different transitions depending on what version of Premiere Pro you are using.

3) Once you've decided what transition you want to use, drag and drop it into your video clip panel.

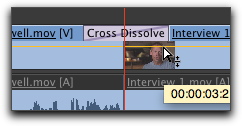
cross dissolve in the timeline
This is what it looks like when you drop the transition in the desired place.

4) Once the transition you have chosen is in the desired place (They can be placed between two overlapped clips as well as at the beginnings and endings of each clip).

5) Now you can click and drag the left and right sides of the transition, to either shorten or extend it. This is to alter the default time length of the transition. And that's the five steps you need to add transition in!

Bins

When making a project in Premiere pro, you will have to create something called 'Bins', these are basically a way to organise the contents of your project.

To create a Bin all you have to do is click the 'New Bin' Button at the bottom of your project panel. You'll notice that the bin icon is the same as a folder icon. Bins usually contain source files, sequences and even other bins. You will probably use them to store offline clips, main sequences, backup sequences and to organise file types.

Example of a bin below and how you can change the name of the bin so you can keep track of your work: