1) First off you want to select the 'effects' panel on the lower left hand-side of the screen. Open the video transitions folder.
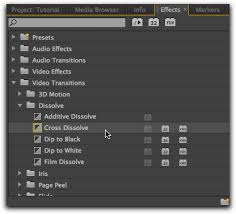 |
| These are the bins that have all the transitions in. |
2) Then you would select the type of transition you want to use. There will be different transitions depending on what version of Premiere Pro you are using.
3) Once you've decided what transition you want to use, drag and drop it into your video clip panel.
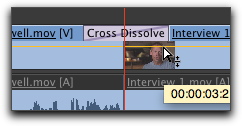 |
| This is what it looks like when you drop the transition in the desired place. |
4) Once the transition you have chosen is in the desired place (They can be placed between two overlapped clips as well as at the beginnings and endings of each clip).
5) Now you can click and drag the left and right sides of the transition, to either shorten or extend it. This is to alter the default time length of the transition. And that's the five steps you need to add transition in!
No comments:
Post a Comment